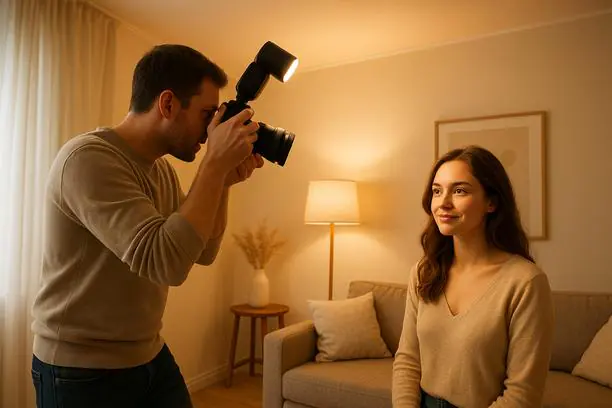
Introduction to Bounce Flash Photography
Bounce flash photography is a technique that leverages the reflective surfaces of ceilings to produce soft, diffused light, which mimics the quality of natural lighting indoors. By directing the flash toward the ceiling, photographers can create a larger light source that significantly reduces harsh shadows and minimizes the starkness often associated with direct flash use. This method not only enhances the mood of indoor photography but also adds a professional touch to images, making them look more vibrant and lifelike.
The ceiling plays a critical role as an unsung hero in this process; it serves as a giant softbox, scattering light in multiple directions. This results in even illumination that flatters subjects, whether you’re capturing portraits or product shots. Employing a bounce flash can also lessen the impact of bright flash exposure on your subjects, allowing for a more natural color rendition. Techniques include adjusting the angle and distance of the flash, experimenting with the ceiling’s color (white ceilings yield the best results), and utilizing modifiers to further enhance light diffusion.
For those looking to master this skill, understanding the fundamentals of bounce flash can elevate your photography, allowing you to take full advantage of the lighting conditions in indoor environments. For better insights into using lighting effectively in photography, check out our related articles on how to use light to create stunning photos and advanced composition techniques.
Understanding the Physics of Light and Bounce Flash
Understanding the physics of bounce flash is crucial for achieving the right lighting effects in photography. When light strikes a surface, its behavior changes based on angles, distance, and the texture of that surface.
Light Behavior and Angles
When light is bounced from a source, the angle at which it hits the surface significantly impacts how much light is reflected and its quality. Using the law of reflection, the angle of incidence (the angle at which the light hits the surface) equals the angle of reflection. This means that positioning your bounce flash at a proper angle can drastically change the shadows and highlights in your image. For instance, bouncing light off the ceiling can create a softer, more diffused illumination, which is ideal for portraits (Source: Photo Tricks).
Distance Matters
The distance between the bounce flash and the subject also influences the intensity and quality of the light. As the light travels further, it dissipates, leading to softer lighting effects. Photographers often exploit this to either enhance the natural look or to create a more dramatic effect by adjusting the distance and power of the flash (Source: Golf Bays).
Surface Texture Effects
The texture of the surface from which light is bounced also plays a critical role. Smooth, shiny surfaces can reflect light sharply, while rougher textures diffuse the light, creating a softer effect. For example, a white wall will reflect light in a more flattering and even manner than a colored or textured wall, which might color the light or create undesirable shadows. As a photographer, understanding these variables allows better control over the final image (Source: Good Karma Sport Fishing).
By thoughtfully considering these aspects of light interaction, photographers can manipulate the bounce flash to create the desired mood and aesthetic in their shots. For more detailed techniques on utilizing light effectively, check out our guide on how to use light in photography.
Essential Equipment for Bounce Flash Photography
For successful bounce flash photography, the right equipment is crucial. Here are the essential components that every photographer should consider:
- Flash Unit: A high-quality, adjustable flash unit is the foundation of bounce flash photography. Look for a flash that allows for bounce angles and has sufficient power to illuminate your subjects, even in larger spaces. Some popular models include the Canon Speedlite 600EX II-RT and Nikon SB-5000, which provide flexibility and control in various settings.
- Diffusers: Using diffusers can soften the harsh light produced by flashes. Softboxes, umbrellas, or even simple DIY solutions like a piece of white foam board can help create a more appealing light. These tools alter the light’s quality, spreading it over a larger area and resulting in softer shadows, which are more flattering for portraits and products alike (Source: DIY Photography).
- Bounce Surfaces: The surface off which you bounce the flash significantly impacts the quality of light. Ideal surfaces include white ceilings or walls, as these reflect light uniformly. It’s essential to ensure the surface is ample enough; larger surfaces create softer, more flattering illumination. Using wider walls or ceilings expands the light source’s size, enhancing the soft output desired in bounce flash photography (Source: The Phoblographer).
- Camera Settings: Understanding your camera settings is vital. Adjust the ISO, shutter speed, and aperture to complement your bounce flash usage effectively. A slower shutter speed can increase light sensitivity, while a wider aperture allows more light to hit the sensor, resulting in better-exposed images. Don’t forget to experiment with high-speed sync if you’re shooting in bright conditions.
All these tools collectively enhance your ability to capture stunning images with bounce flash. For further techniques on optimizing your flash usage, consider exploring our guides on off-camera flash techniques and mastering exposure in photography.
Techniques to Perfect Your Ceiling Bounce
To master bounce flash photography, several key techniques can significantly enhance the quality of your images, giving them a more natural look akin to soft, ambient light.
- Adjusting Flash Power: Start by fine-tuning the flash output. Reducing flash power can help avoid harsh lighting, especially in close-up shots. A key principle is that the size of the light source relative to your subject influences how soft the light appears. Bouncing your flash off larger, even surfaces allows for a diffuse light that wraps around your subject, minimizing harsh shadows and creating a more flattering effect (Source: Digi-Texx).
- Manipulating Distances and Angles: Distance and angle play crucial roles in bounce flash photography. Position your flash at approximately 45 degrees from your subject and about 1.5 to 2 times the height of your subject. This angle helps soften shadows and reduces the chances of direct light hitting your subject. Utilize different angles—experiment by tilting the flash upwards to bounce off the ceiling or sideways to a wall, depending on the environment and desired effect (Source: The Phoblographer).
- Using Reflectors and Diffusers: Incorporate reflectors, such as white foam boards or bounce cards, to redirect and soften light into shadows. This technique enhances the overall lighting balance. A black foam board can further refine shadows, creating depth in your images when shooting against light backgrounds (Source: Shopify).
Experimenting with these elements can dramatically elevate your bounce flash photography, emulating natural light effects that flatter your subjects. For further tips on lighting, explore our guide on using flash effectively.
Common Mistakes and Troubleshooting Tips
Using bounce flash can greatly enhance your photography, but common pitfalls can lead to less than ideal results. Here are some mistakes to watch for and troubleshooting tips to ensure you optimize your shooting process:
- Inconsistent Light Quality: One frequent mistake is the tendency to point the flash directly at the subject rather than bouncing it. This results in harsh lighting that can wash out details. Instead, aim to bounce the flash off a neutral-colored ceiling or wall, which diffuses the light and creates a softer, more flattering illumination for your subjects. Bouncing the flash not only helps in achieving better skin tones but also reduces harsh shadows (Source: Digi-Texx).
- Incorrect Angle or Distance: Many photographers forget to adjust the angle and distance according to the environment. The angle at which you bounce your flash can dramatically affect the light’s quality. Be mindful of your surroundings—if possible, position yourself so the flash bounces off a larger surface area. This not only increases light coverage but softens the shadows created on the subject (Source: Digi-Texx).
- Wrong Flash Settings: Another common error is neglecting the flash settings. Ensure that the power output of the flash matches the ambient light conditions. If the flash looks too overpowering, adjust the exposure settings on your camera or reduce the flash output. Use manual mode to control both shutter speed and aperture effectively, especially in variable lighting scenarios (Source: Belfast Live).
- Flash Not Being Used at All: Sometimes photographers avoid using flash altogether, thinking natural light alone will suffice. When indoor lighting is not adequate, using bounce flash can save your photos from appearing dark or grainy. Embrace the flash—it’s a versatile tool that can create amazing effects when used correctly (Source: Digi-Texx).
- Continuous Learning: After your shoot, assess your images critically to identify recurring mistakes. You might find that certain adjustments could have drastically improved your results. Revisiting and re-editing your past work is an invaluable step in honing your skills and refining your technique (Source: Shopify).
By avoiding these common mistakes and applying these troubleshooting tips, you can enhance your use of bounce flash and achieve consistent, high-quality results in your photography. For further insights on optimizing your camera settings for specific situations, check out our guides on camera modes and flash usage techniques.
Leave a Reply